Microsoft’s SQL Server Reporting Services is a popular Business Intelligence framework. Through SSRS, administrators can analyze, collate, and synthesize data from a variety of sources into easy to consume web-based reports. It is common for third-party software to rely on the rich underpinnings of SSRS for integration purposes, choosing to make SSRS reports available through its own interface.
Since data is used to make decisions, it is very important to protect privacy and prevent tampering over the network. Imagine a nosy employee intercepting salary data, or a bad actor manipulating a report in-flight in order to present altered data! This is why securing SSRS with SSL/TLS is so important – SSL/TLS provides both encryption and message integrity. Securing SSRS can be confusing at first however, with a couple of “gotchas” along the way.

Configuring SSRS
It is recommended to configure SSRS BEFORE applying an SSL/TLS certificate.
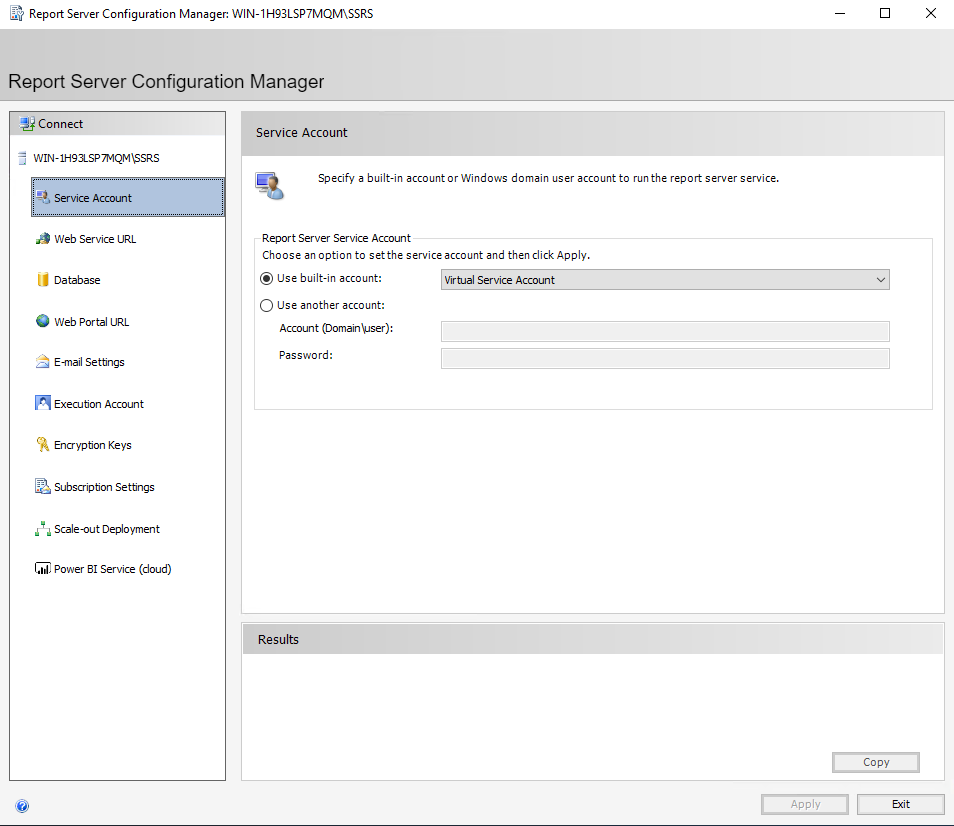
By default, SSRS will create a “virtual service account”. For those familiar with Active Directory, this is somewhat similar to a localized version of a GMSA (Group-managed service account). This special local account doesn’t require you to set a password. In certain situations, it is preferable to use a domain account. In the case of third-party integration, often the account running the software also runs the SSRS instance!
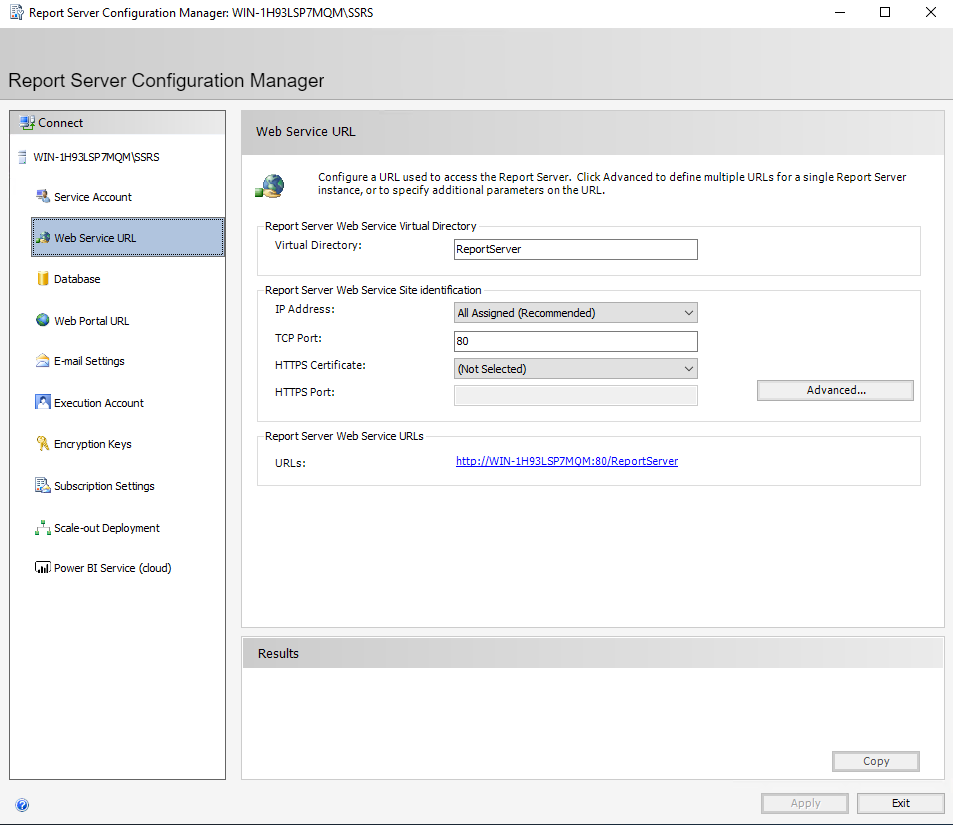
On this screen, simply hit “Apply” to accept the defaults. We will come back in and replace this with an HTTPS connection later, but this will allow us to proceed through the rest of the setup.
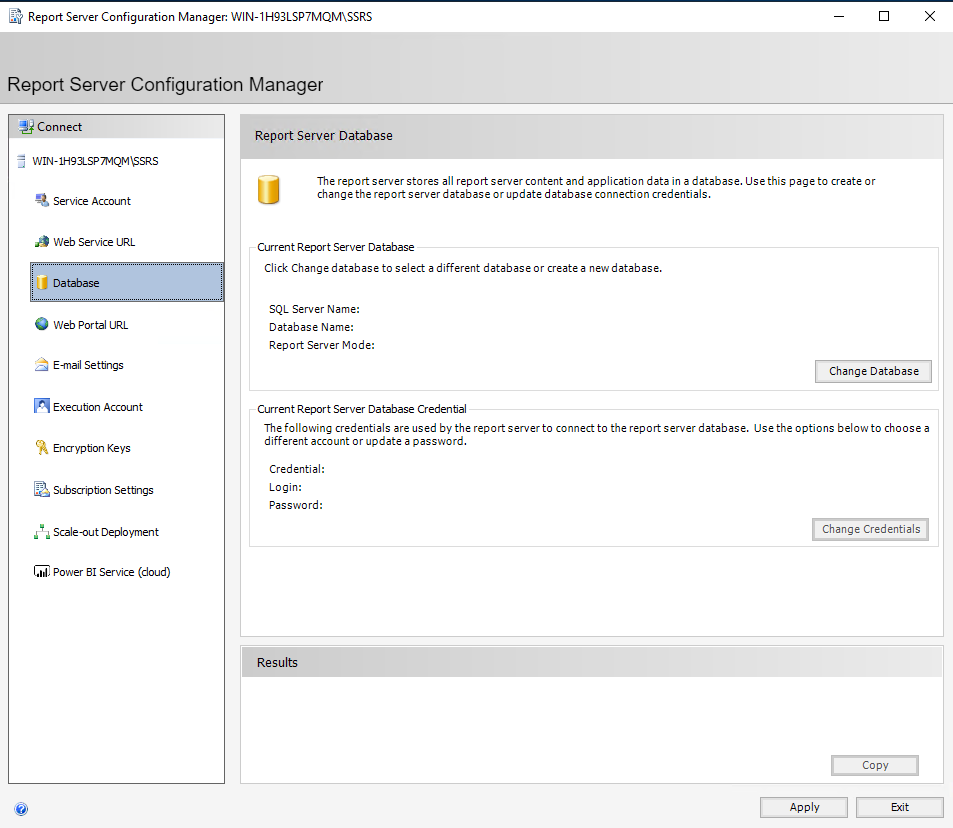
Under “Database” we must create a database for our SSRS instance. Somewhat counterintuitively, select “Change Database”.
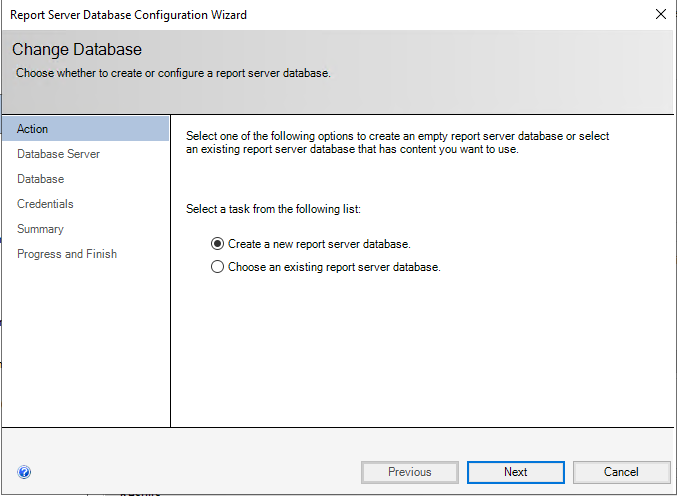
Select “Create a new report server database”. (Or, if this is an upgrade/migration, choose an existing report server database instead). Usually, SQL Server runs on the server running Reporting Services itself, but it is possible to configure it to point to another server.
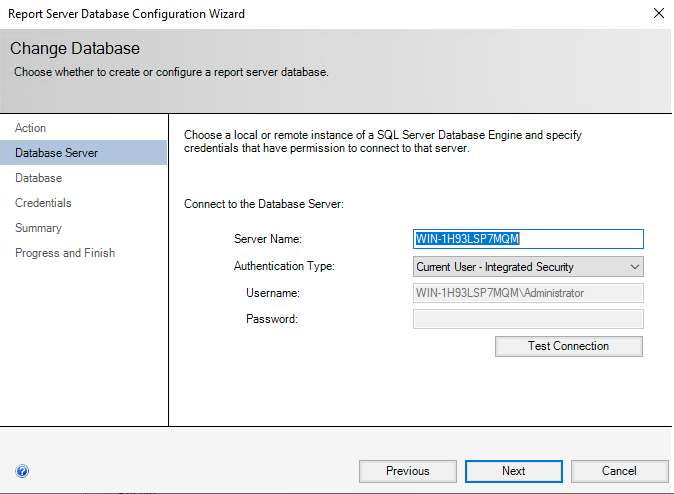
If the user you are signed in as has sysadmin level privilege on your local SQL Server instance, simply select “Next”. This establishes a connection to the instance for configuration purposes, but the credentials chosen on this screen are NOT persistent. Don’t worry about SSRS running as your administrative user in perpetuity!
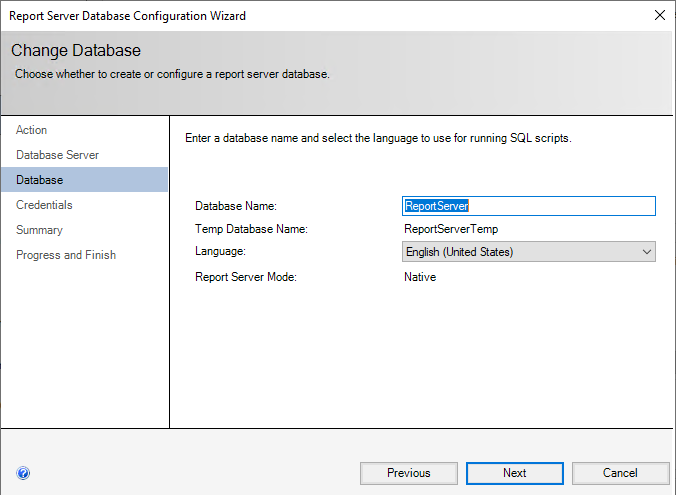
Select “Next” to create your Report Server database. Most of the time, your report server mode will be “Native”. The alternative is a Sharepoint-managed SSRS instance, which is installed as part of a Sharepoint deployment through a different tool.
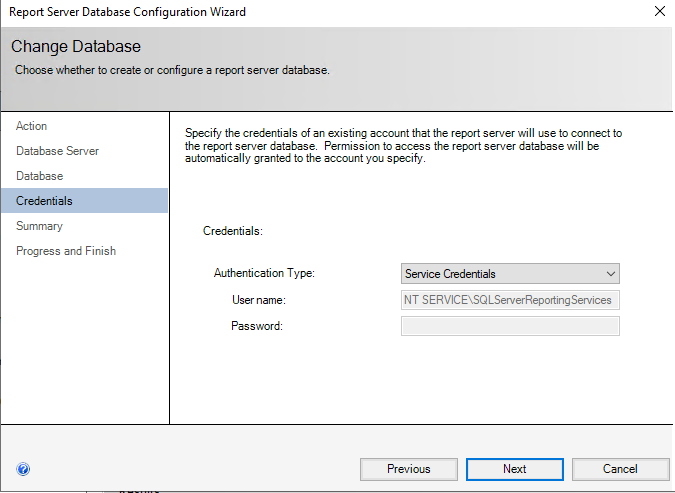
On this screen, we specify the credentials SSRS will use going forward to connect to SQL Server. The default is to create an account for this purpose with least privilege. In most cases, this is the best choice.
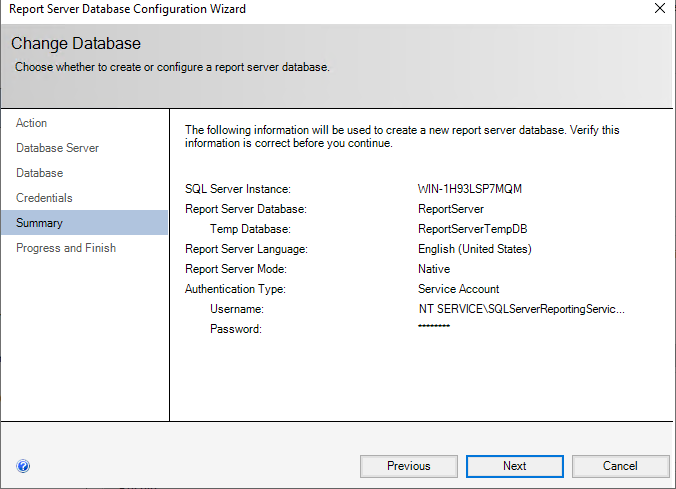
On the summary screen, select “Next”. SSRS will begin its database configuration routine.
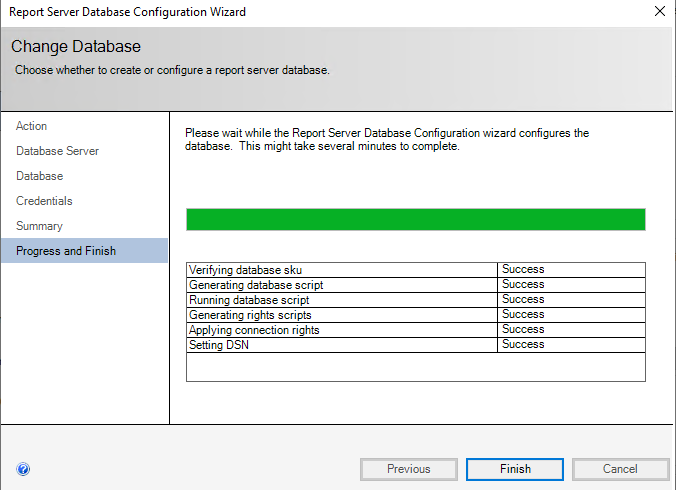
The wizard takes three to four minutes. When it completes, select “Finish”.
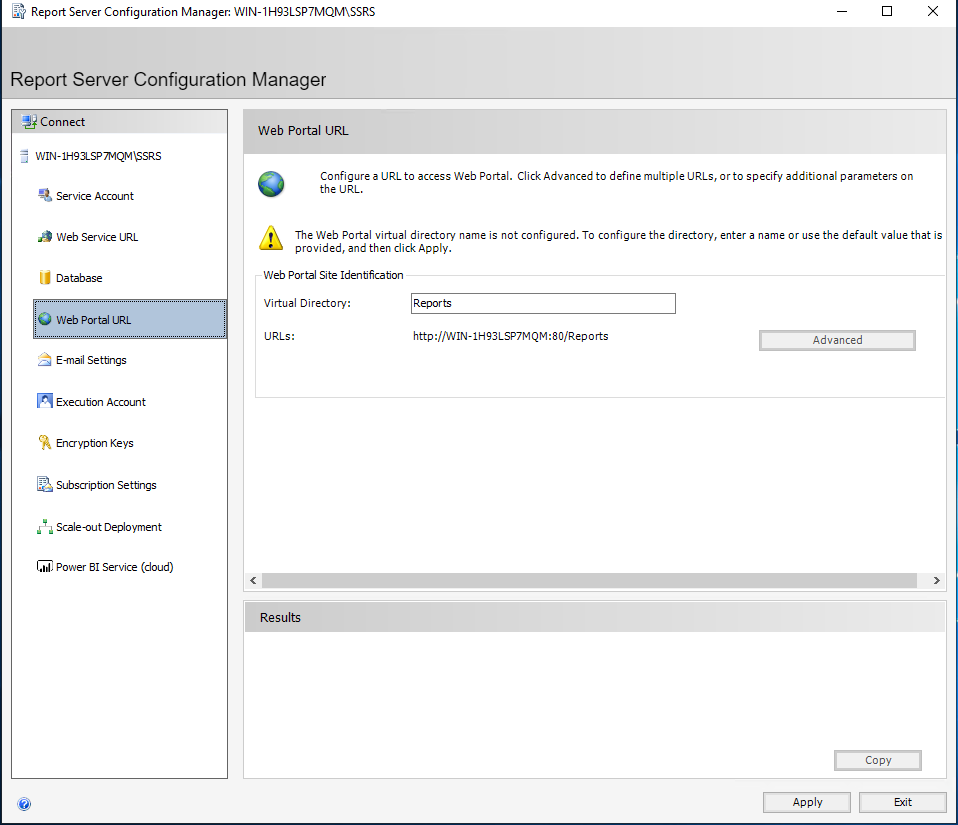
Select “Web Portal URL” and choose “Apply”.

Email settings are important to configure if you want to be able to email out reports on a schedule.
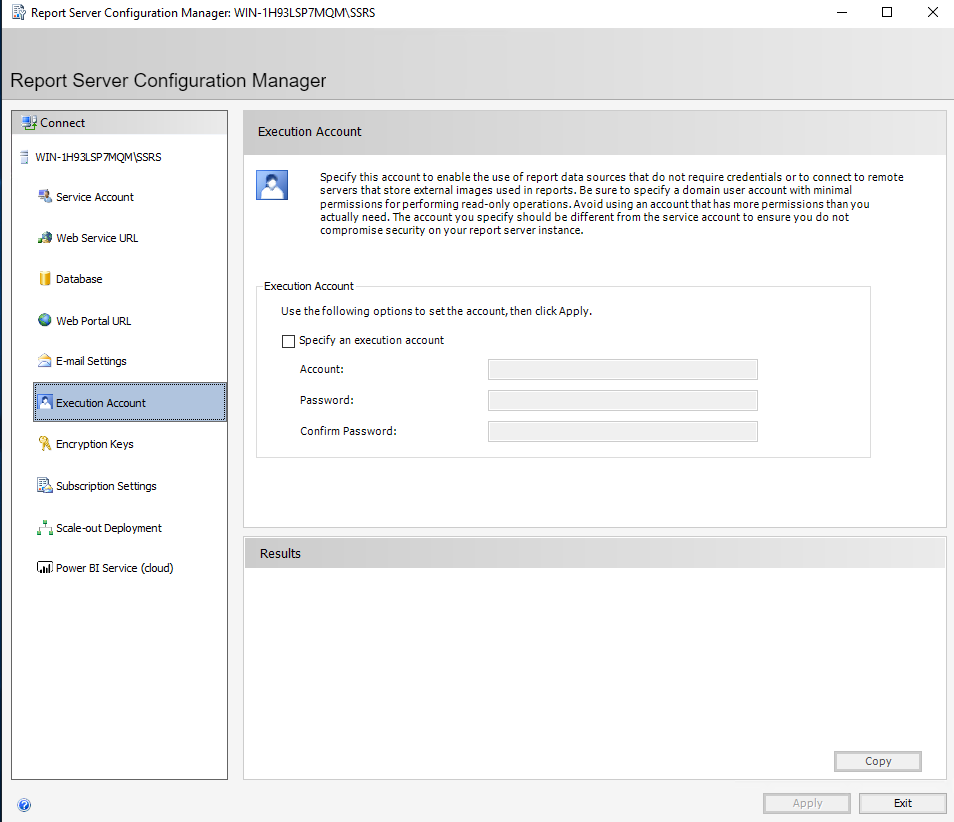
Execution Account allows you to specify a service principal in whose context certain operations to remote servers will run. Most of the time, we can leave this blank. In the cases it is required, it is usually called out in vendor documentation.
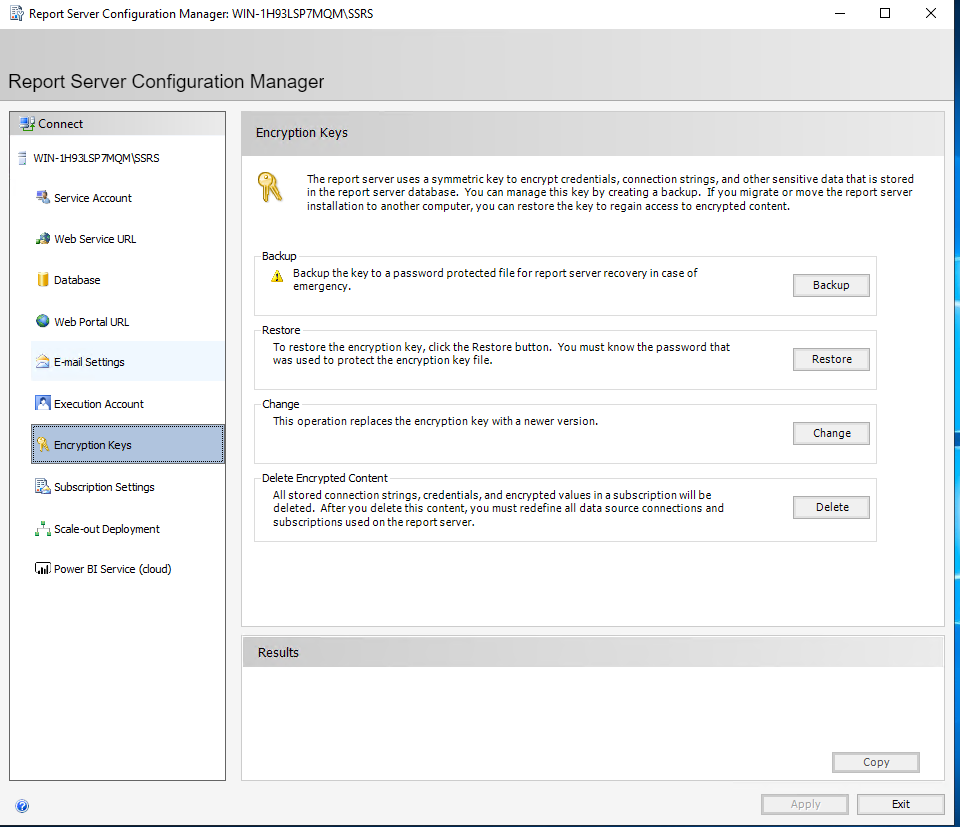
Take a backup of your encryption keys.
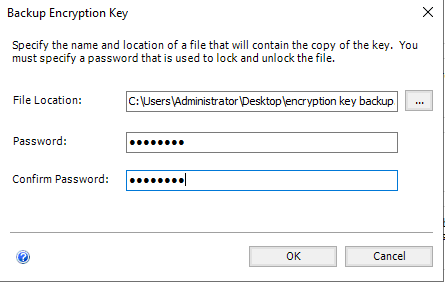
You will need to specify a password, which will be used to protect the symmetric key. Be sure to record this passphrase for safekeeping, this will be absolutely required during upgrades of SSRS.
Unless your vendor documentation says otherwise, “Subscription Settings”, “Scale-Out Deployment” and “Power BI Service” can usually be ignored. These constitute certain advanced features of SSRS.
Adding an SSL/TLS Certificate
Your SSL/TLS certificate must now be setup in two separate spots, which can be confusing at first. Since SSRS’s configuration tool will let you specify a certificate that is present in the machine store’s personal certificate node, first we must import a certificate to this location. Alternatively, we could create our CSR from the MMC on the SSRS Server (which stores the private key on this machine in the “Certificate Enrollment Requests” node), and subsequently import our signed response from our CA.
n.b. Ensure when creating your CSR to populate the SAN name field in the certificate, even if it is the same as the common name. This is required for browsers to trust your certificate!
Older versions of SSRS were notorious for being unable to work with wildcard certificates. More recent versions do not have this problem.
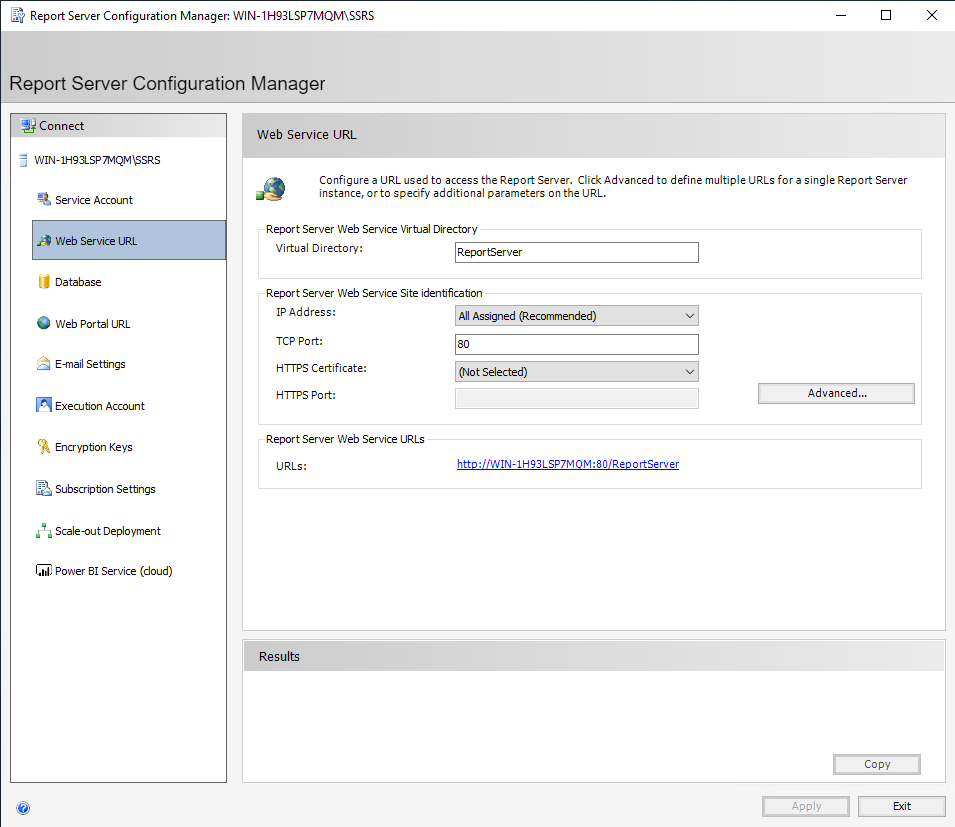
Under “Web Services URL”, select “Advanced”.
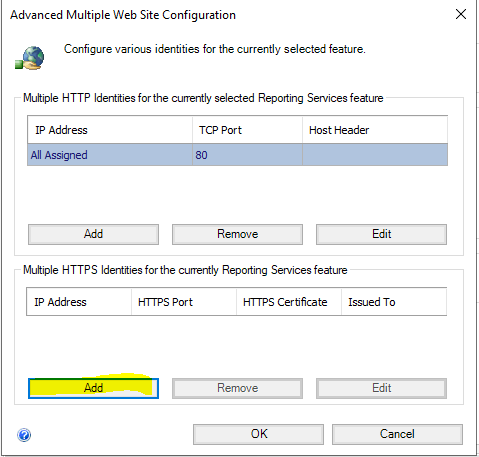
Choose “Add” on the bottom.
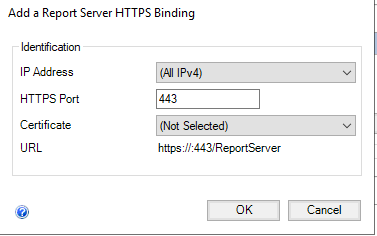
Choose a “Certificate”. Available options are sourced by enumerating anything in the machine store’s node. Ensure that you select a certificate with a corresponding private key! Anything in the personal node will appear, but a certificate without a private key is not a valid selection, and will result in cryptic errors.
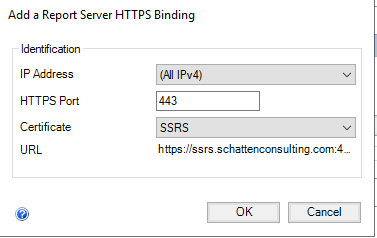
Note that “URL” is sourced from the common name of the certificate.
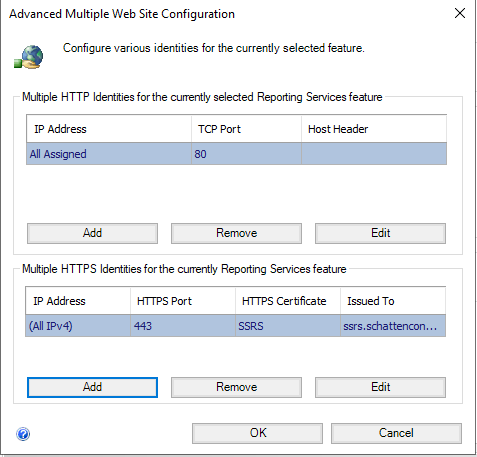
Optionally, remove the HTTP Identity, and then select “OK”.
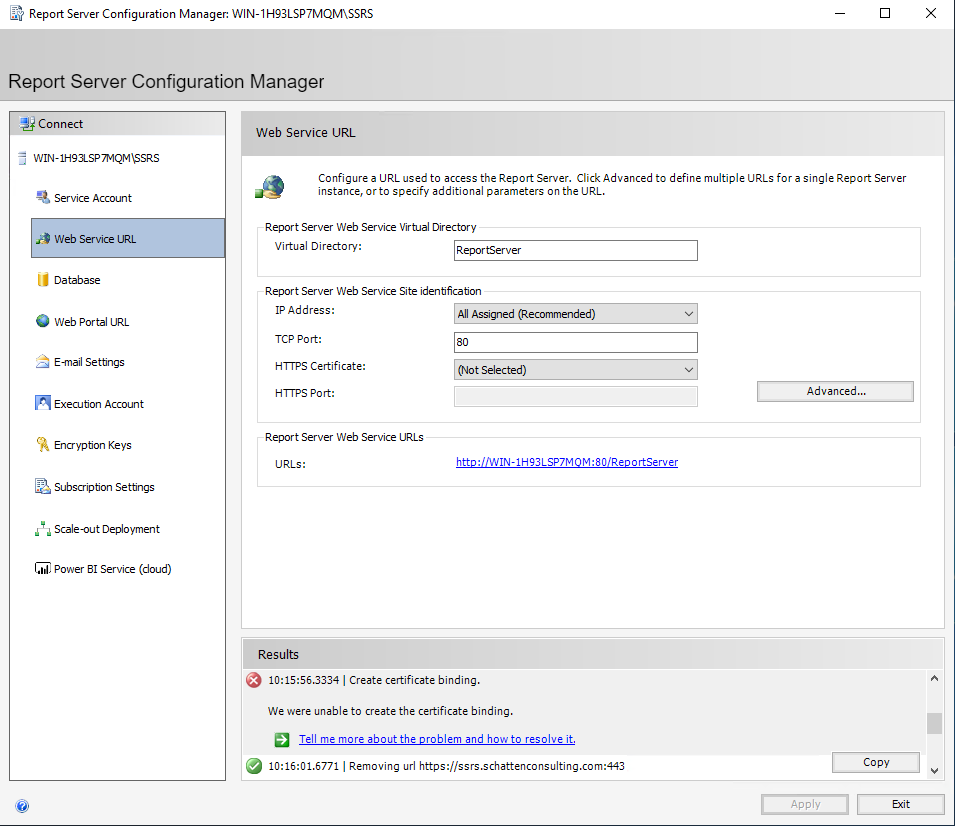
The above error is common in the case of using an internally signed CA. The underlying windows machine MUST trust the certificate chain of the certificate you select in order to create a binding for it. If needed, add relevant root and Intermediate Certificate into the appropriate machine certificate stores!
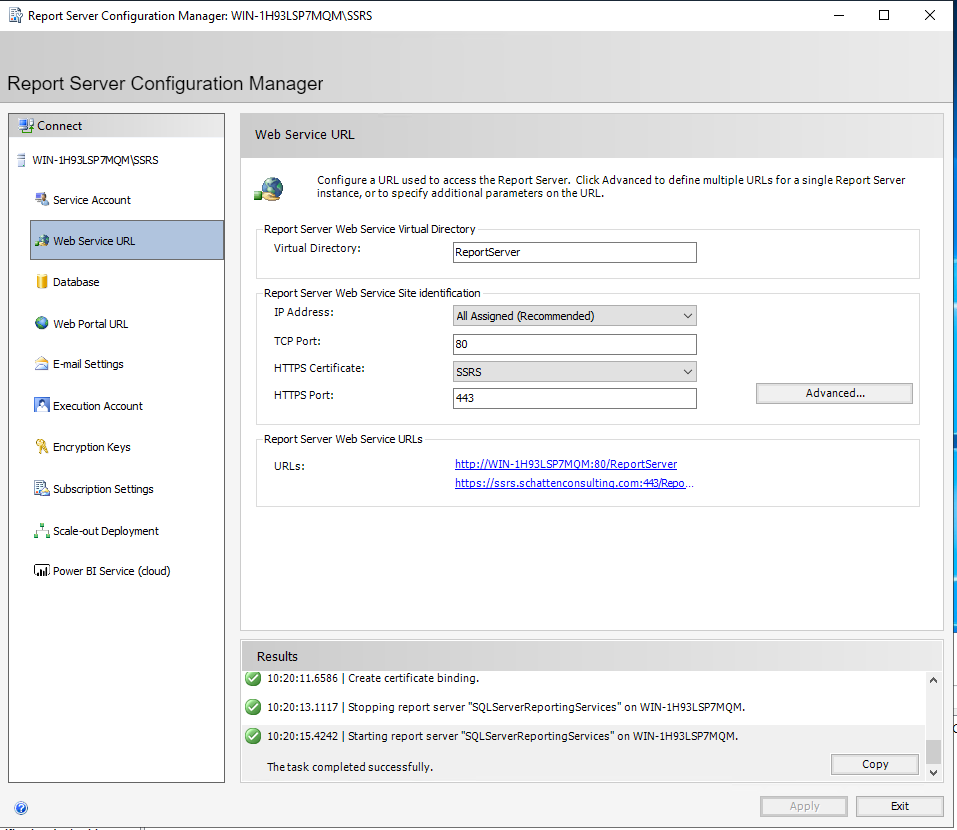
Once the configuration has been appropriately applied, the “apply” button will become greyed out.
Next, select “Web Portal URL”.
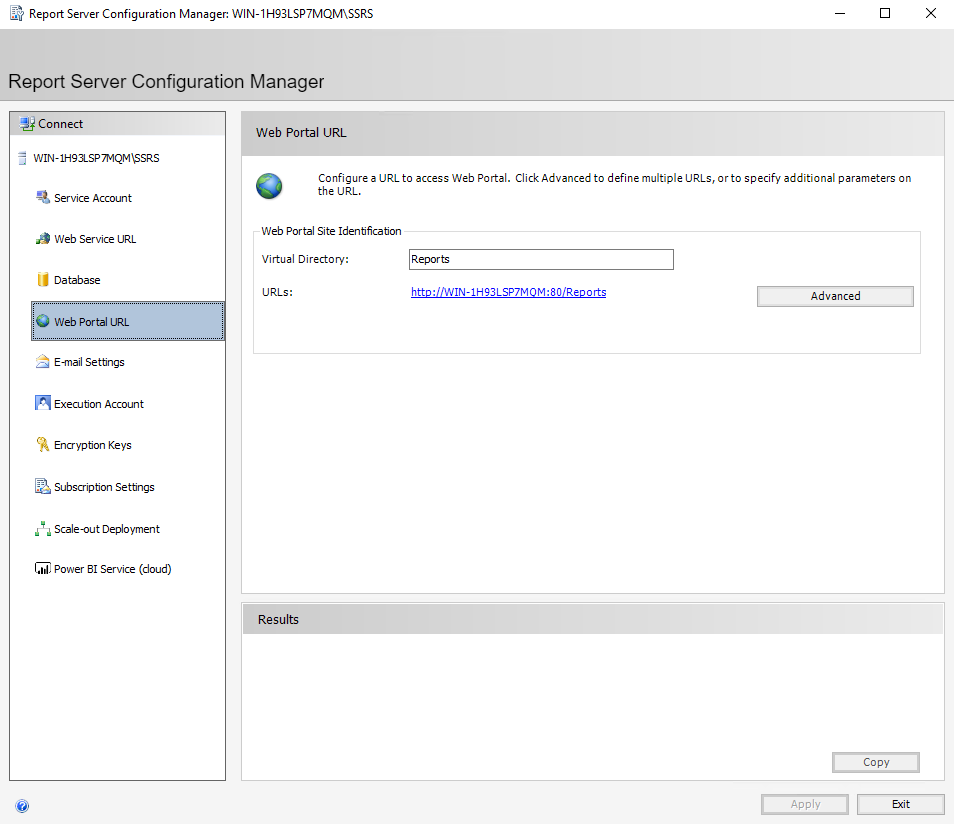
Select “Advanced”.
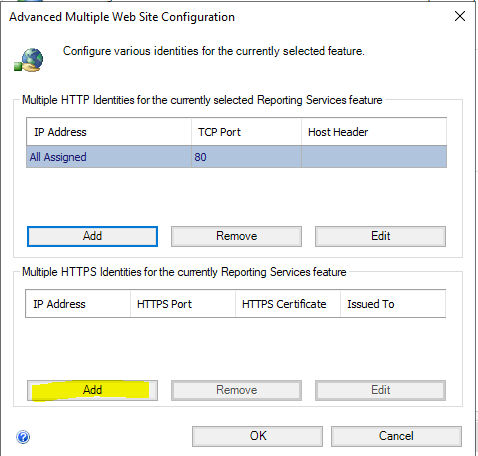
Once again, select the bottom “Add” button.
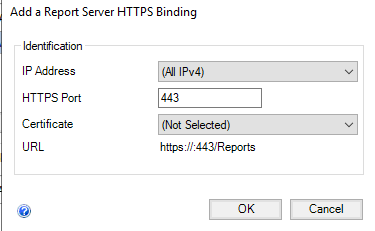
Choose your certificate (the same selection as before is fine).
Select “OK”.

SSRS is now configured to use SSL/TLS!
